How I would build up a new product database with Baserow for my Shopify business

Introduction
Looking for an easier solution for setting up products on your Shopify store? Overwhelmed with managing your product data? Don’t worry, I’ve got you covered. In my last article, I talked about Baserow and how it’s changed our approach to data management. Well, it’s time to take a deeper dive and learn about it in action.
Baserow is a powerful, yet beginner-friendly, no-code tool that allows you to create your own database. Its biggest benefit? You can construct your database in the way that best suits your Shopify business. It’s simple, flexible, and will help you stay on top of your data management.
One of the most useful features of Baserow is its ability to generate ready-to-import CSV files. This feature is especially handy when dealing with Shopify - making it possible to set up products 10x faster.
In my previous article, I shared how Baserow enhanced our approach to product data management. Now I will guide you step-by-step on how to effectively build your Shopify product database using Baserow. Ready to start simplifying your life? Let’s go!
Making sense of product data management with Baserow for Shopify
First, I will show you how to I organize our product data by setting up a central table for all our data management activities. This table will be the backbone of our data management system, where most of oour data editing will happen. It consolidates our data editing tasks to one place, keeping our work tidy and organized.
Next, I’ll demonstrate how to connect this central table to a specialized ‘Shopify’ table. This connection is where the magic of Baserow truly shines, enabling a continuous flow of data that minimizes errors and saves you effort.
Finally, I’ll guide you on how to work with different views of the Shopify table. Why? Because each view functions as a unique lens to your data. In our case, these views will facilitate an effortless export of ready-to-import CSV files for Shopify. Sounds relieving, right? It is!
What do I need to get started with Baserow?
If you just want to follow along I would recommend you to sign up for a free account at https://baserow.io. This will give you a running Baserow instance with a limitation of 3.000 rows per workspace. It’s free and good enough to get started. Dependant on your needs, this might even be enough as a permanent solution.
There are some premium features in Baserow you can get for a subscription. Although they are not really necessary from a functional point of view, I have decided to pay for it, because some of the features are helpful and with this I can give a little bit back to the project. The most useful features of the premium version for my own usecase are:
- Row Coloring: You can set conditions for coloring rows. I use this feature mark rows with missing mandatory fields
- Kanban View: This enables you to enable a Kanban view based on a singl select field. I use this to keep track of rows that are actionable
- Survey + Calendar view: Although I do not use these features they still might become useful later on
Setting up my Database in Baserow
For my Shopify Product Database, I will set up the following 3 tables to get started:
- ID table: This is optional, but as my company manufactures products, this table helps us keep track of our ID numbers (EAN/GTIN).
- Product List: This is the primary operational table that lists and manages all product attributes.
- Shopify: This table will be connected to the Product List table. It will hold different views that facilitate the easy export of ready-to-import product data for Shopify.
To keep things straightforward, I will stick to the fields defined in the Shopify import/export CSV, although these can be expanded as needed later on. So, let’s get started setting up the tables:
Setting up the ID Table (optional)
The ID table is very simple. It will have a column for the GTIN/EAN, SKU and some boolean fields that show on which platform the ID is used.
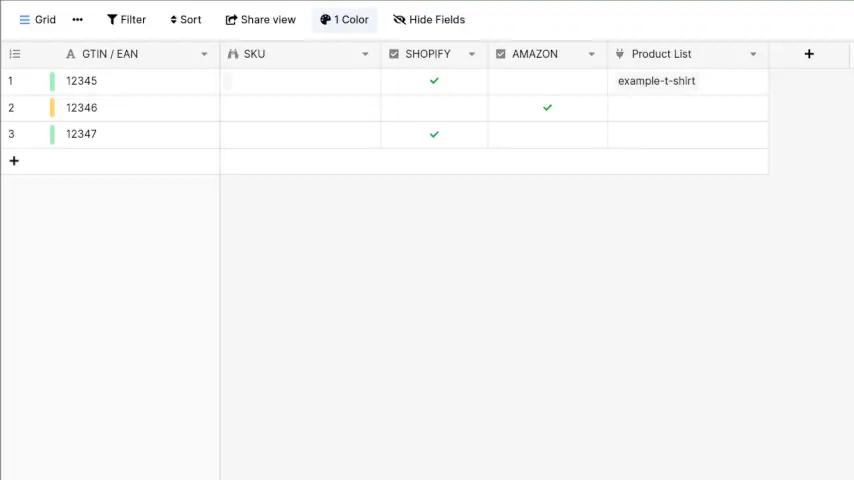
Creating the ID table
Shopify
The basic setup is straightforward. I will head over to Shopify, download the example CSV file, and then import only the headings into Baserow. You can download the example CSV file here: https://help.shopify.com
Now we can just create a new table in Baserow, name it Shopify and import the example we just downloaded from Shopify. Don’t worry, Baserow will figure out the column names on its own.
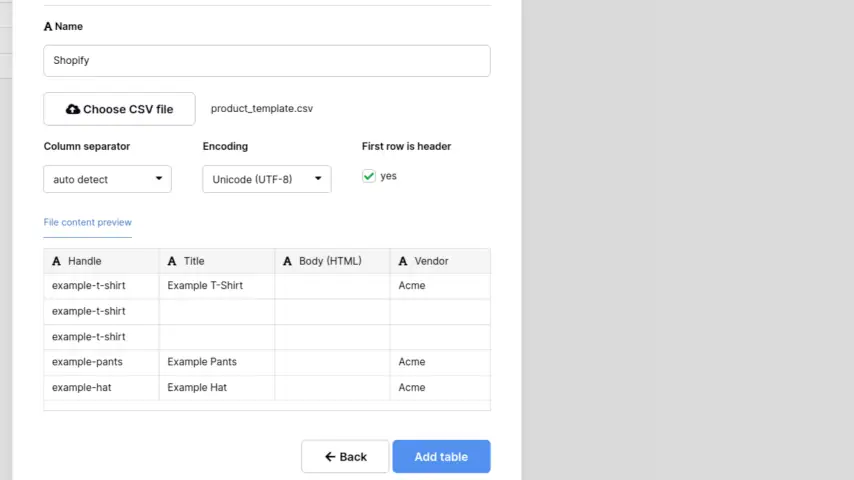
Import a Shopify CSV template into Baserow
As the example CSV contains example product I will just delete them, as I do not need them.
Product List
For the Product List table, I will use the Shopify example as a starting point and add additional useful columns that I want to include in my product database. For instance, I will set up an image_url column for the main image of the product. As this table is not exported for Shopify, I can rename the column names to whatever is most clear and meaningful to me.
This will provide the foundation for creating essential connections, auxiliary columns, and efficient table views, all of which will be covered in the following sections.
To set up the product list I will just repeat the steps from setting up the Shopify table, but I won’t delete the products this time.
Making table connections
Table connections are very useful when it comes to use the data from my Product list in the Shopify table. It takes a little bit of effort to setup initially but will be well worth it.
The key point is that connected tables make it possible to use any field of one table in another table. For my purposes this will make sure that products are only edited in one place.
The Shopify table will mostly consist of connected fields that directly refer to the ‘Product List’. The logic behind this is that it allows the easy creation of new entries in the Shopify table essentially through establishing connections on the Product List.
Doing so permits any modifications or additions in the Product List to be automatically reflected in the Shopify table. This reduces duplication of effort and ensures that any alterations made to your product data are consistently updated across both tables.
Thus, the heart of your database, the Product List, controls your product data adjustments while the Shopify table remains an up-to-date reflection of this information. As a result, everything stays cohesive, putting you in control and making your Shopify product management more efficient.
Creating the link between the tables is very straightforward. Basically I can just hit the + column and select Link to table.
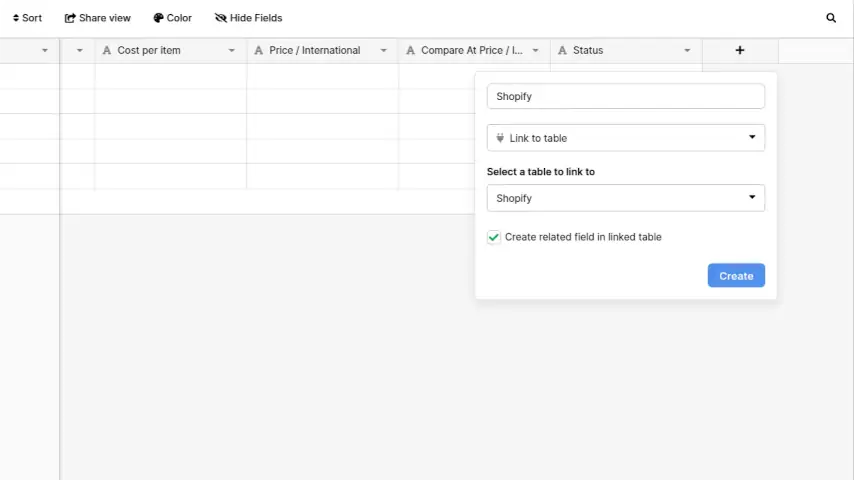
Connecting the Product List and the Shopify table
Now comes the tedious part. This only has to be done once, but we need to go through the columns of the Shopify table to convert them into a Lookup field and map the columns to the Product List table.
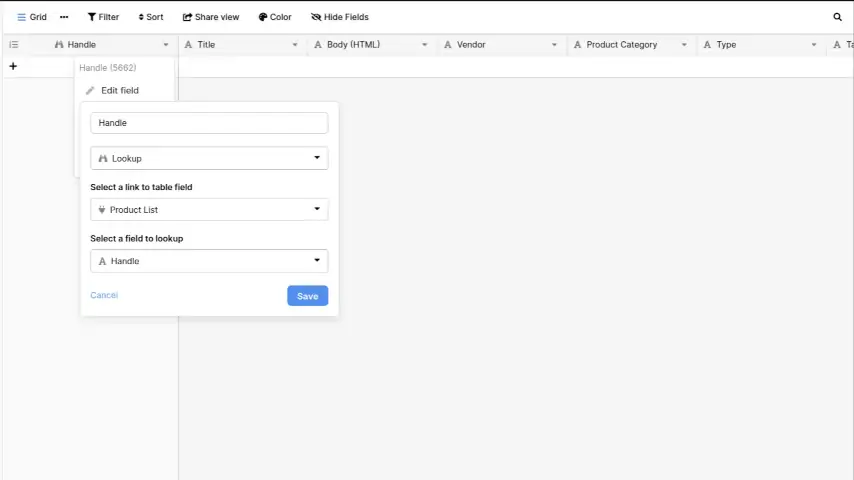
Creating Lookups for the Shopify table
Now I will also create a link between the ID and the Product List table. In our production database we have all of our product identifiers in the ID table to have an overview about the identifiers, SKUs and platforms. Moreover, I add a Lookup field for the SKU.
Now that all of this is done I can create new entries for the Shopify table by hitting the + on the connected column I earlier named Shopify, hit the + in the popup window and just scroll down and hit create.
Now this will do all the magic 🧙: This will create a new row in our Shopify table and get all the data from our product list 🎉.
Changing column types and creating useful helper columns
For now, our Product List may not provide the most comfortable editing experience. We can change this by changing the Single Line Text columns to more helpful column types. For example we can change all the columns containing TRUE/FALSE to Boolean (e.g. the Published column).
We can also add some Single Select fields, for example the Variant Inventory Tracker field.
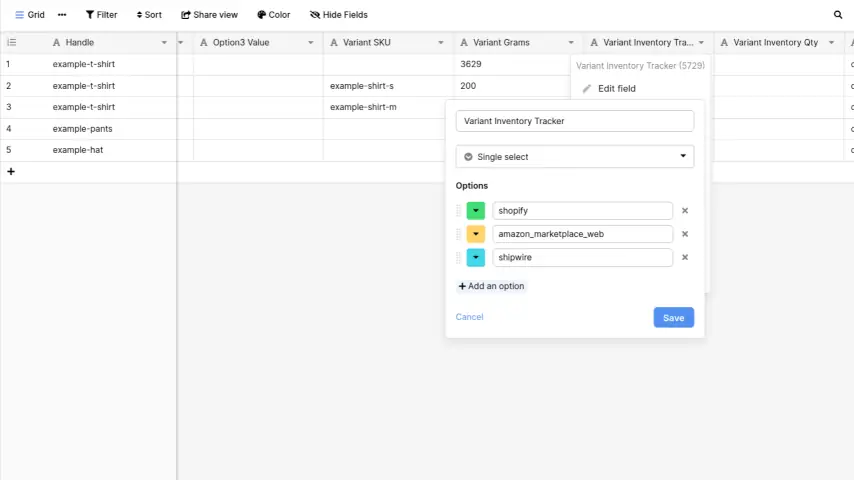
Changing column types
When it comes to helper columns a simple example I always use is a helper column for counting the characters on the SEO related fields.
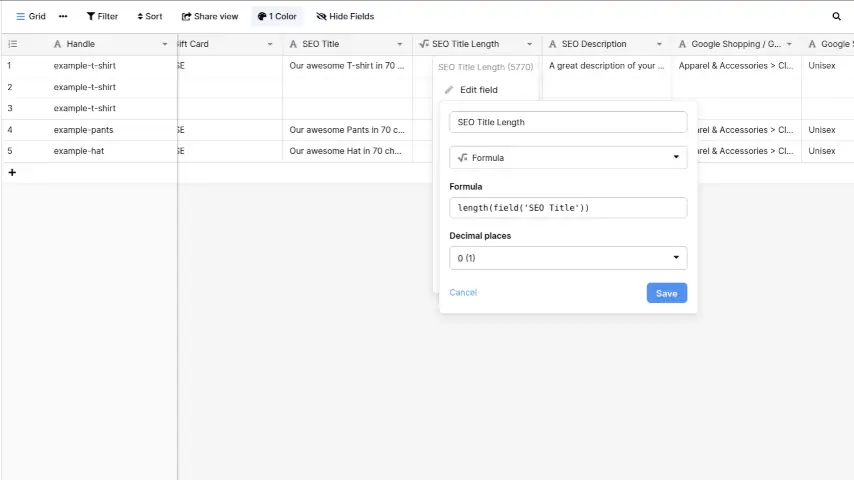
Helper column for SEO fields
Optimizing Data Management with Table Views
Another highly effective way to manage your data within Baserow is by making good use of table views. Utilizing table views can significantly enhance how you interact with and understand your data.
The power of table views is in their flexibility and customizability. They allow you to segment your data into digestible, targeted views, each serving a specific purpose. They can provide a clear line of sight to the data you need without the noise of unneeded information.
-
Simplified Views: One of the best use cases for table views is creating simplified, stripped-down versions of your data. For instance, instead of sifting through complete details of all products, a simplified view could show only essential parameters like product name, price, and stock levels.
-
Export Views: These are optimized for generating ready-to-import files for Shopify. Instead of manually selecting the data to export each time, creating a dedicated view that already includes all necessary fields can be a huge time saver. You can even create multiple export views catered to different tasks like product setup, price updating, or stock level adjustments.
-
Kanban Views: If you often handle tasks that progress through different stages, such as product development or content creation, Kanban views can be particularly useful. Through the visual layout of a Kanban view, it’s easy to see progress at a glance and to move tasks through different stages.
-
Actionable Views: In cases where you need to take actions on specific datasets, a view that only includes actionable items can help maintain focus and reduce clutter. You could, for instance, have a view that only displays products with low stock levels.
-
Custom Views: With Baserow, you can also tailor views to specific needs. Whether that’s separating out products by different categories, tracking items based on when they were last updated, or any other scenario unique to your operations.
By properly using different table views, you can sort and filter your way to ideal views for each unique task or purpose. As a result, managing your product data in Baserow becomes more streamlined, contributing to the better operation of your Shopify store.
For example, I have a view for the completeness that only shows entries missing optional or required fields.
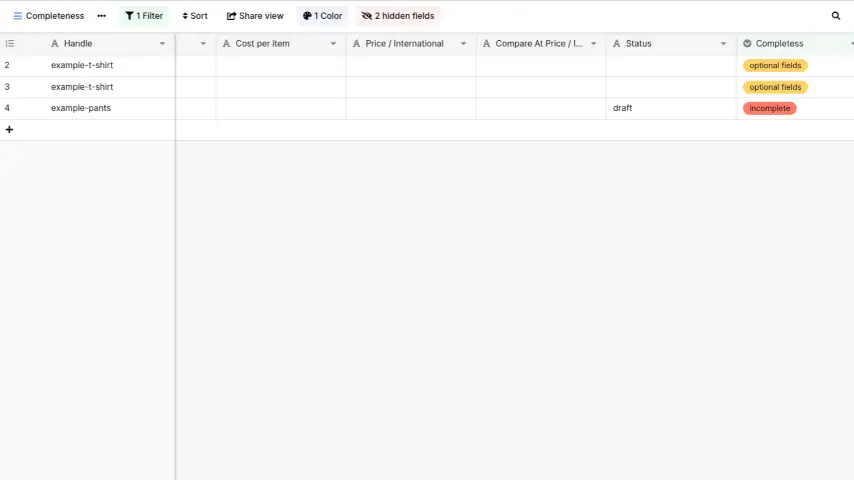
Completeness view
Conclusion
As we wrap up, we have demonstrated a simple yet highly effective way to manage your product data for Shopify using the powerful tool of Baserow. This guide has taken you through the process of setting up fit-for-purpose tables, the beauty of making strategic connections, the added value of helper columns and the power of various customized table views.
Where you go from here can be a truly exciting journey of discovery and refinement.
-
Extending Product Attributes: Extend your ‘Product List’ table with more product attributes. Consider what specific information would be beneficial to have directly accessible for each product. This could range from adding detailed dimensions to considering SEO keywords associated to products.
-
Extending Tables for Other Platforms: This data management approach is transferable. Think about creating dedicated tables for other platforms you use for your business, such as Amazon or your private ERP system. Each new table can seamlessly connect and interact with your existing ‘Product List’ table, ensuring you remain in control, with your data accessible, no matter where it’s needed.
-
Automation: Start exploring the opportunities for process automation. Baserow has various features that can assist in automating repetitive tasks. Plus, when used in combination with other tools with API integration, the automation potential can be significantly extended. Everything, from automatic updates to your Shopify store down to sending you a daily summary report, even if you don’t log into Baserow, could be automated.
No matter where you decide to go from here, remember that the goal has always been about achieving better control, better efficiency, and hopefully a whole lot less stress in managing your product data. Empowered with Baserow and the tips highlighted in this guide, you’re now more than prepared to visit those horizons. Happy exploring!